Blogger is a popular platform for creating blogs and sharing content with the world. Whether you're a seasoned blogger or just starting out, adding a download timer button to your site can be a great way to enhance user experience and encourage engagement. In this guide, we'll walk you through the simple steps to add a download timer button to your Blogger site.
Why Add a Download Timer Button?
Adding a download timer button to your Blogger site can serve several purposes:
In the HTML editor, paste the following code:
Make sure to replace "YOUR_DOWNLOAD_LINK" with the actual download link you generated earlier.
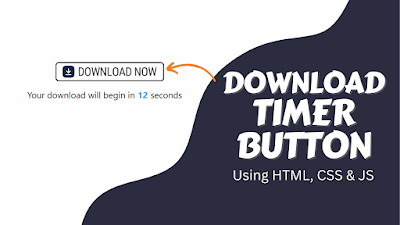
What is a Download Timer Button?
A download timer button is a clickable button on your website that allows users to download files, such as documents, images, or software. The timer aspect adds an extra layer of engagement by prompting users to wait for a specified period before they can access the download link. This can help build anticipation and encourage users to stay on your site longer.Why Add a Download Timer Button?
Adding a download timer button to your Blogger site can serve several purposes:
- Encourage Engagement: The countdown timer can pique users' curiosity and encourage them to wait for the download link to become available.
- Build Anticipation: By making users wait for a brief period, you can build anticipation and make the download feel more valuable.
- Increase User Interaction: Interactive elements like download timer buttons can enhance user experience and encourage visitors to explore your site further.
Step 1: Choose a File to Share
Before you can add a download timer button, you'll need to have a file ready for users to download. This could be a PDF document, an image, a zip file, or any other type of file you want to share with your audience. Make sure the file is hosted online and accessible via a direct link.Step 2: Generate the Download Link
Once you have your file ready, you'll need to generate a direct download link for it. You can do this by uploading the file to a file hosting service or your Blogger site's media library. Once the file is uploaded, you can right-click on it and select the option to copy the download link.Step 3: Create the Download Timer Button
Now it's time to create the download timer button. To do this, log in to your Blogger account and navigate to the post or page where you want to add the button. Then, switch to the HTML editing mode.In the HTML editor, paste the following code:
HTML
<div id="download-button">
  <button id="download-link" onclick="startDownload()">Download Now</button>
  <div id="countdown"></div>
</div>

<script>
  var countdownElement = document.getElementById('countdown');
  var downloadButton = document.getElementById('download-link');

  function startDownload() {
    var count = 10; // Set the countdown time in seconds

    downloadButton.disabled = true;
    var countdownInterval = setInterval(function() {
      countdownElement.innerHTML = 'Your download will start in ' + count + ' seconds';
      count--;

      if (count < 0) {
        clearInterval(countdownInterval);
        countdownElement.innerHTML = '<a href="YOUR_DOWNLOAD_LINK">Click here to download</a>';
        downloadButton.style.display = 'none';
      }
    }, 1000);
  }
</script>
Make sure to replace "YOUR_DOWNLOAD_LINK" with the actual download link you generated earlier.